|
Additionnal devices installation |
  |
MGB
Technical |
Home |
History 2002-2006 |
|
Additionnal devices installation |
|
|
MGB
Technical |
Home |
History 2002-2006 |
|
When I bought my
MGB GT, an electric fan and a pair of front fog lamps were already
fitted but not (or no longer) connected.
I planned to make those work, but as I had no overheating problem nor drove through fog, I was not hurrying. I preferred to drive my car rather than start works. I also wished to add 3 other devices: hazard warning lights, a rear fog lamp and a reverse light. Yet, I did not figured how to fit a reverse light switch on my 3 synchros gearbox, but in September 2006, I decided to install all the other devices.
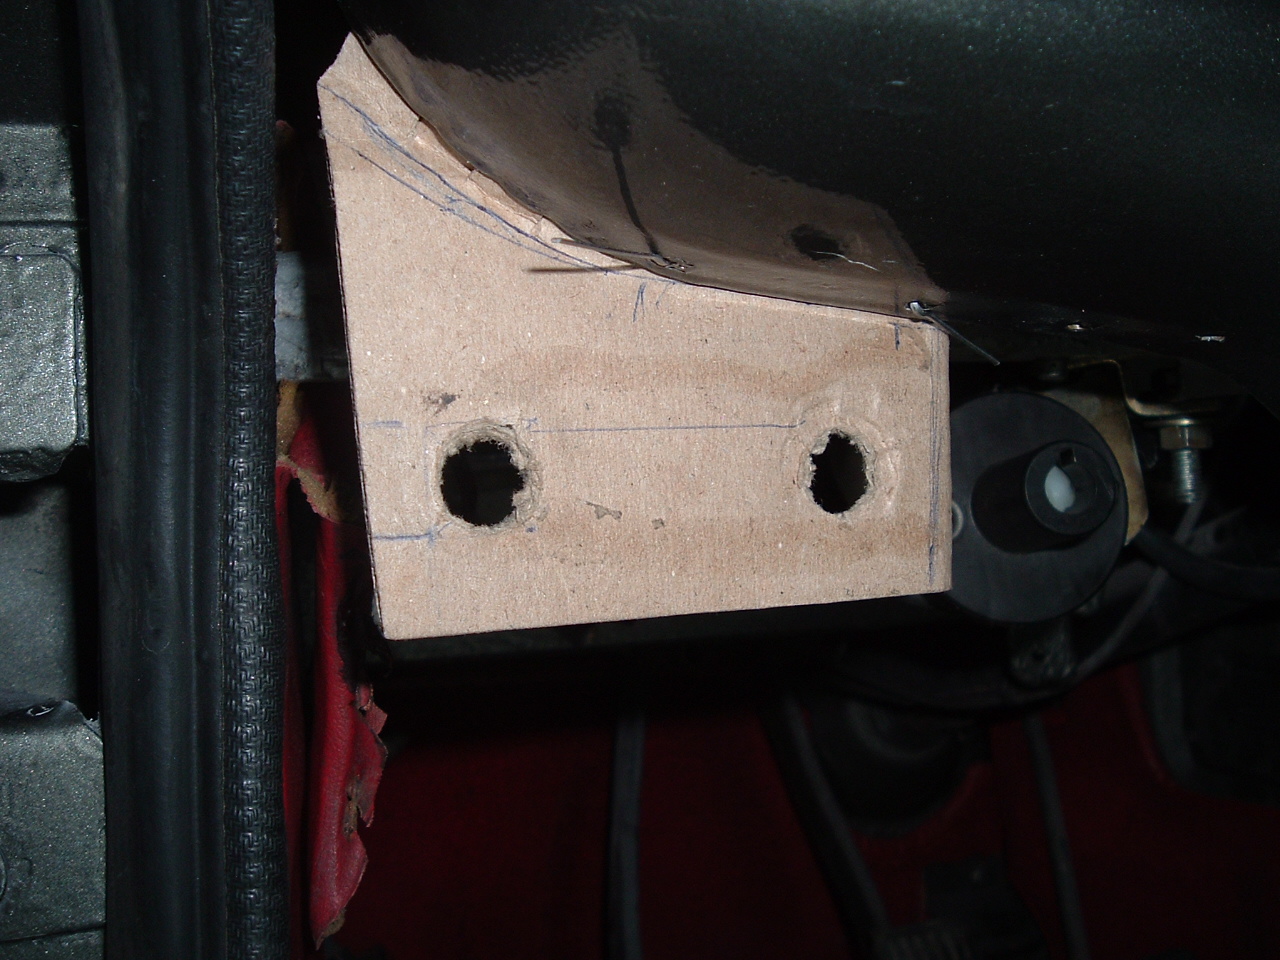
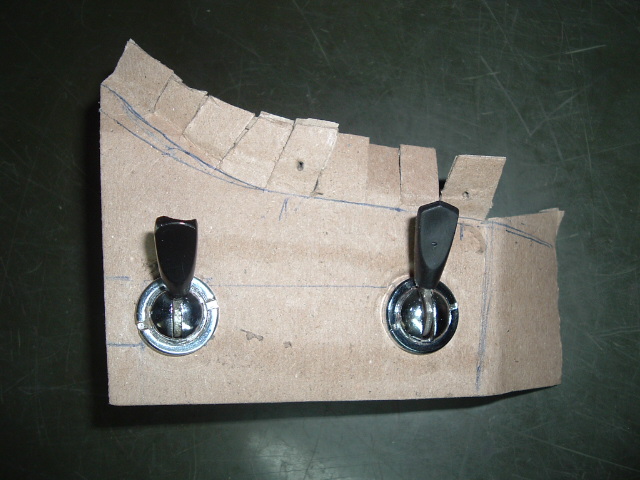
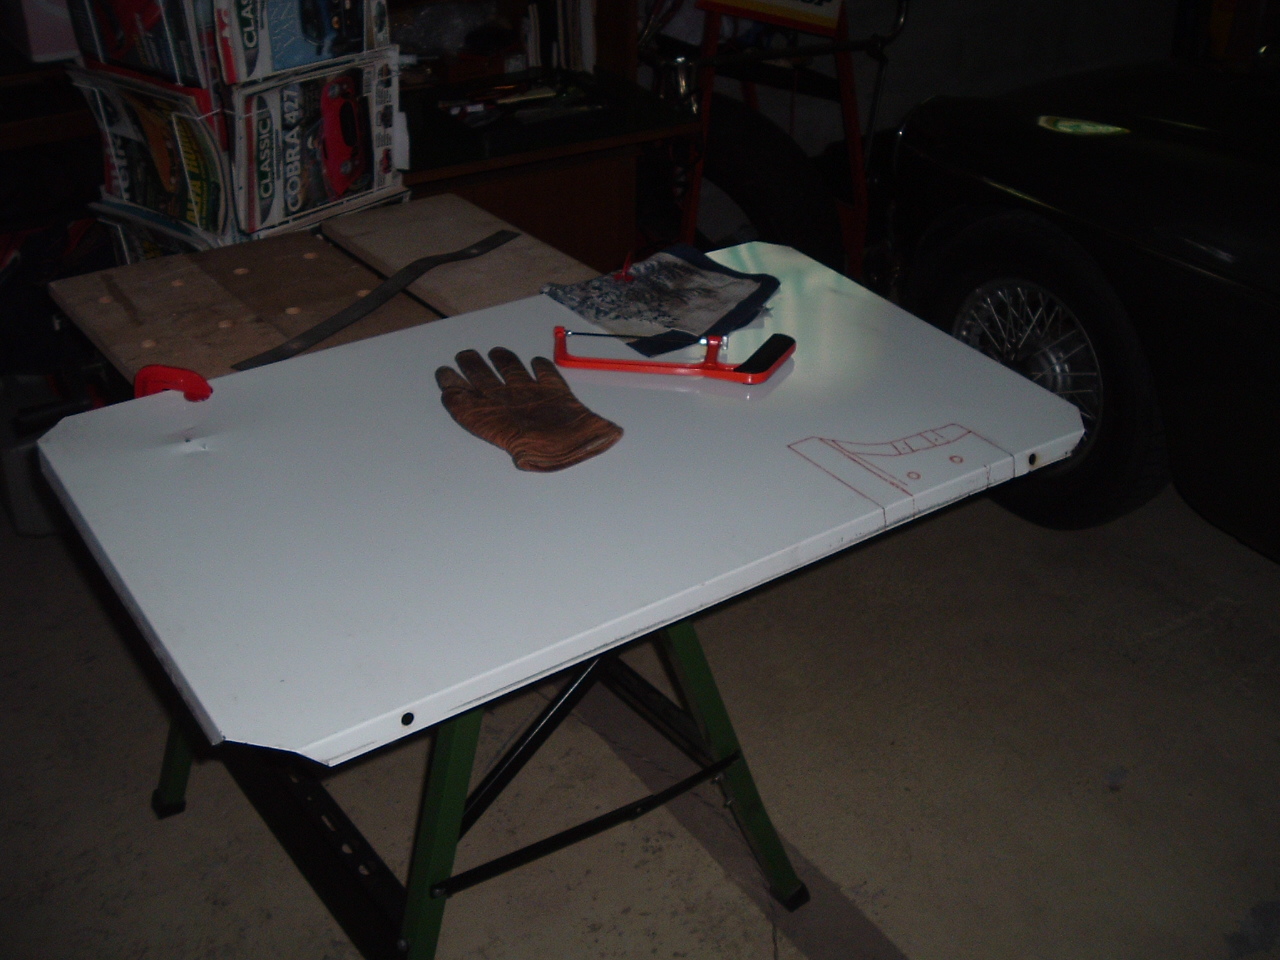
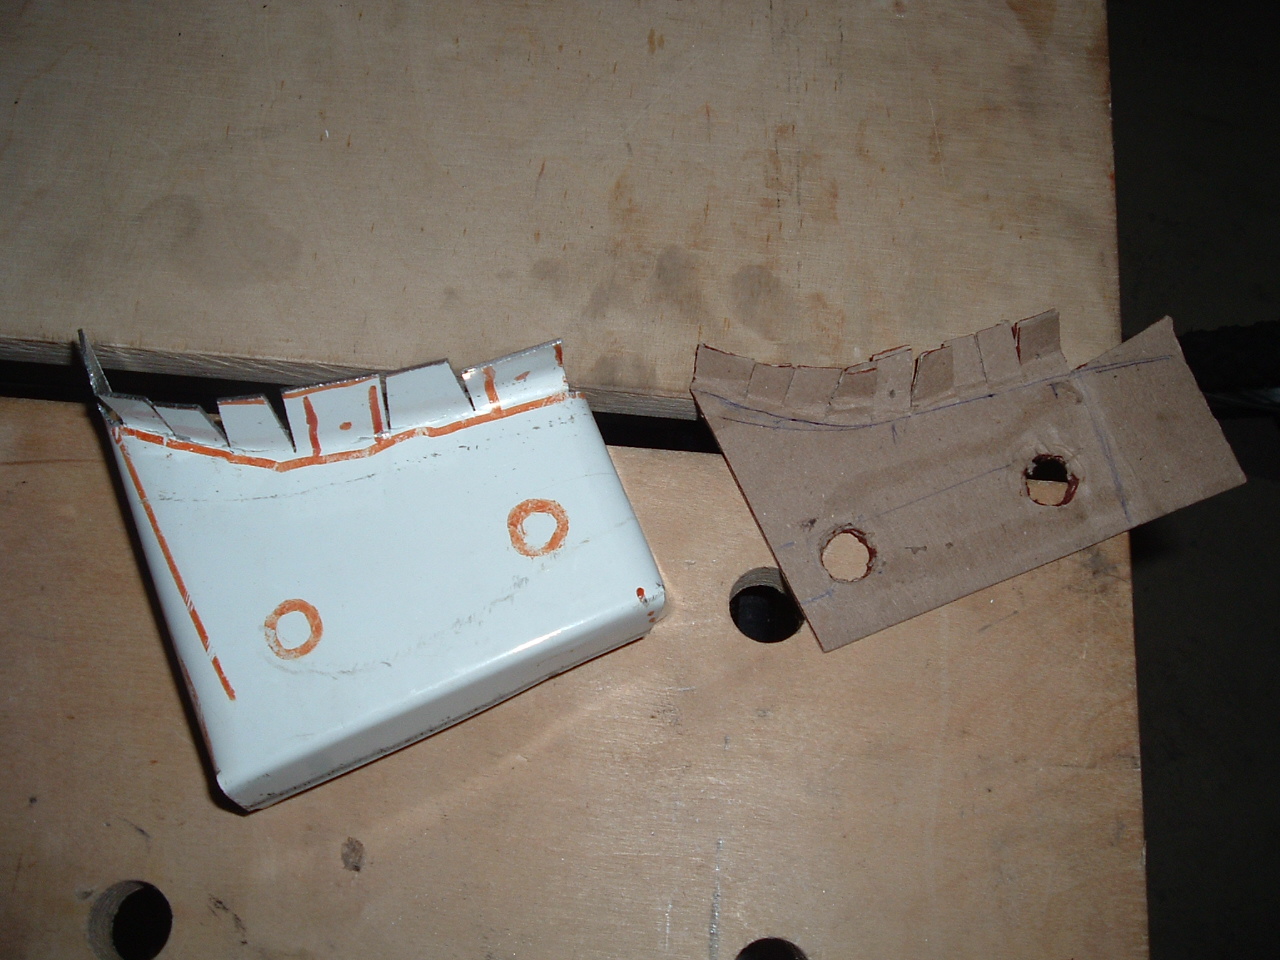
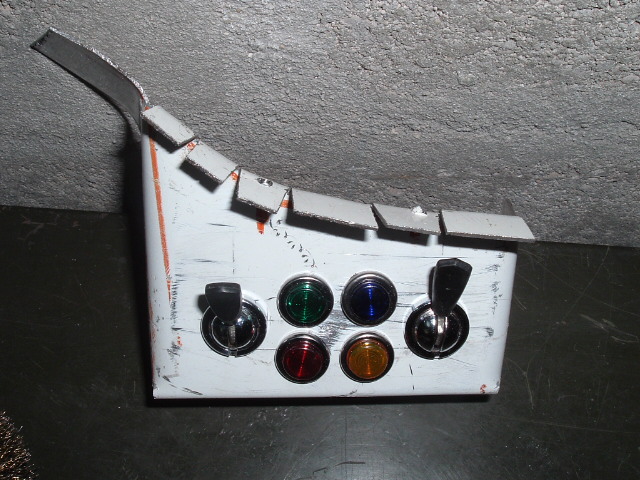
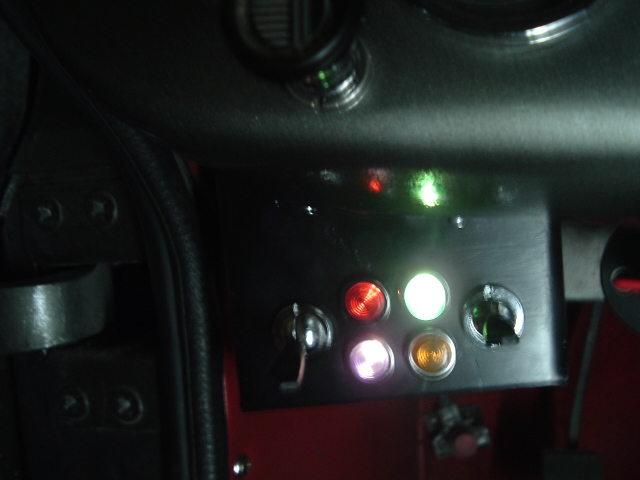
The left hand drive MGB Mk1 dashboard is one of the few parts that are not rebuilt. To find a second-hand dashboard is a potentially expensive quest. Knowing that, it was definitely not an option to drill additional holes in mine to install the rocker switches that will control my new devices, and the relevant warning lights. To create an additional rocker switches panel appeared as a necessity. I chose panel position in the lower left hand side of the dashboard, under the overdrive switch. It is handy and I could see all the warning lights through the steering wheel. I first made a carton prototype to set the dimensions and the lights positions. 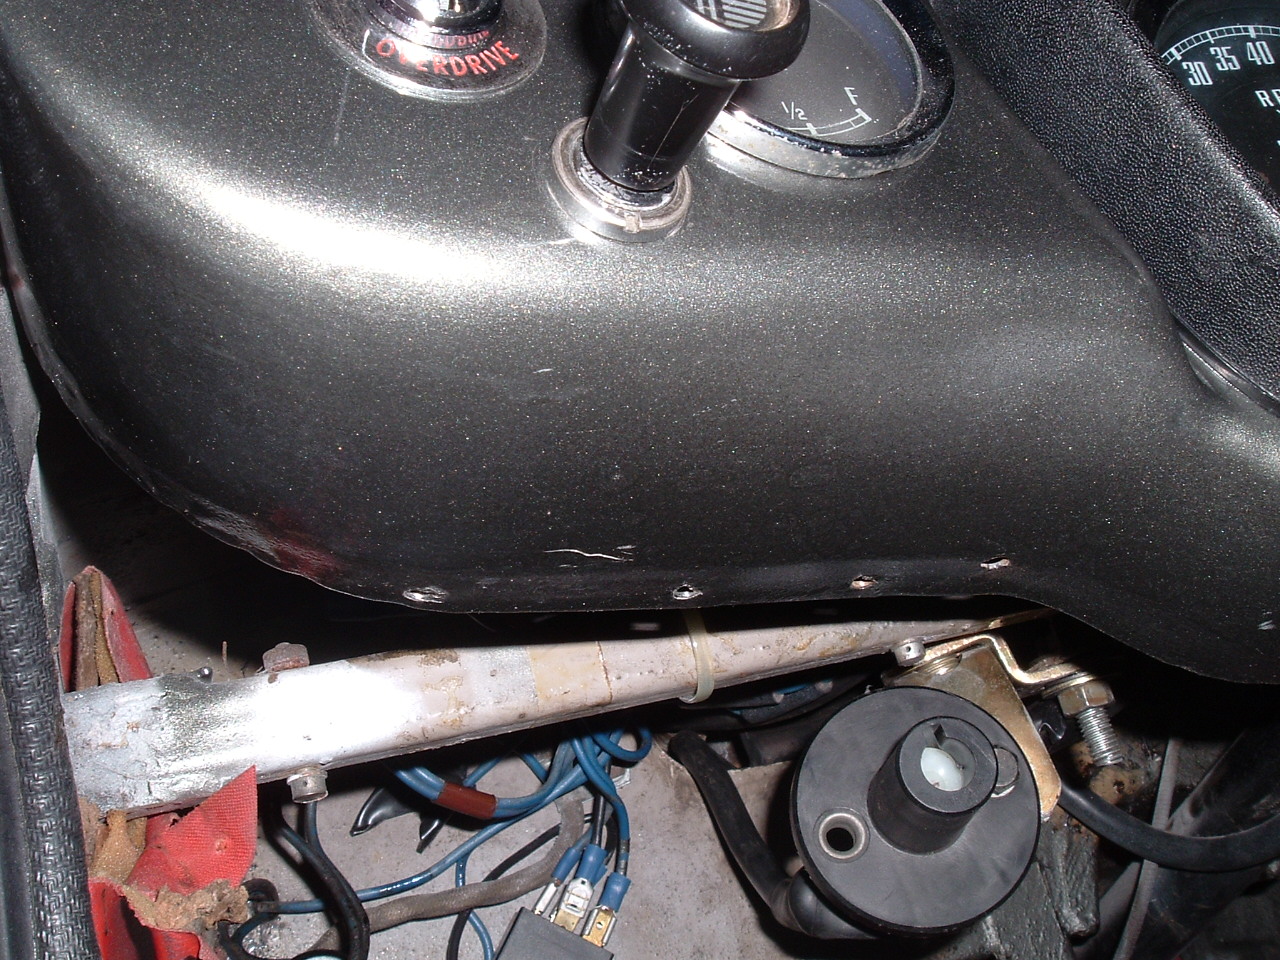
 3rd step : wiring, relays and
connections
I often hear or read that British cars wiring is not reliable, Lucas – the master of darkness invented obscurity, bla, bla, bla… Instead, I believe that several generations of self made electricians among previous owners were lesser reliable than the wiring itself. So I followed 3 rules :
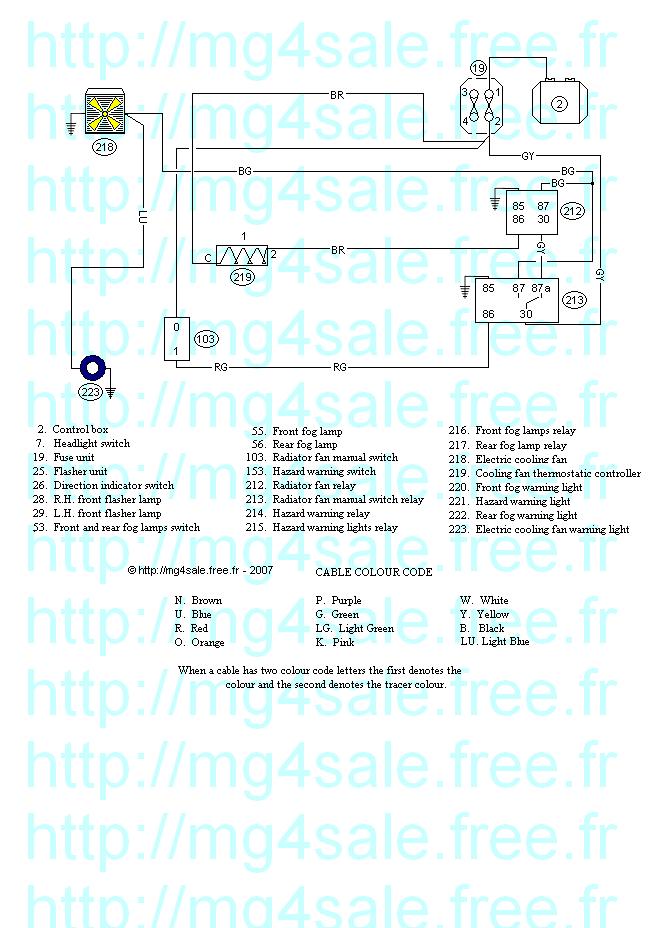
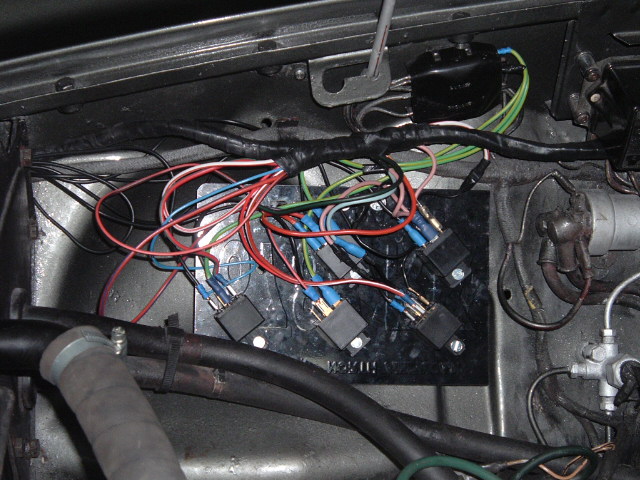
I fitted all my relays on a plastic board, screwed through the inner wing.Wires, as well as warning lights come from AES – Auto Electric Supplies which sells wire per meter in many colour combinations at affordable price. These wires comply with the Lucas wiring colour code. 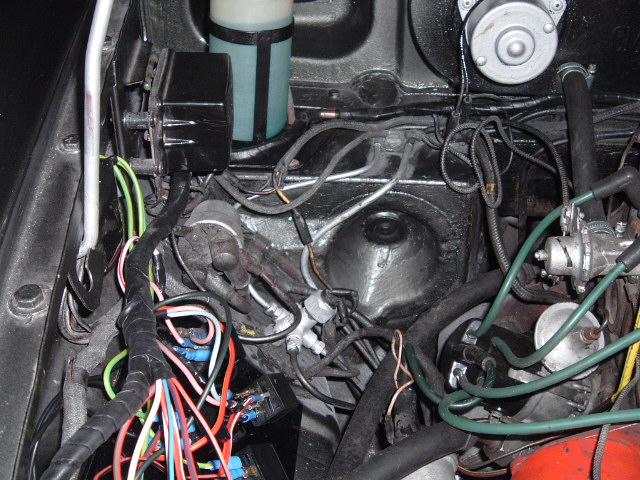
Wiring harness installation : 20 hours Making of the rocker panel : about 5 hours Rear fog lamp installation : 3 hours (including metal clamp welding) Fan thermostatic switch installation : 2 hours Total : 30 hours Time spent to find bad connections : 0 hour 00 minute Everything worked as expected on the first attempt. If you plan installation of one of these devices, you will find individual wiring diagrams for each device below. Click to enlarge.
|
|
|
MGB
Technical |
Home |
History 2002-2006 |